
As the cold days of winter roll in, there’s nothing quite as comforting as a hot drink brought to you by your electric kettle. When you run into issues with your kettle it might be tempting to head to the store for a replacement. However, before you replace it and recycle it at one of our many depots throughout B.C., we encourage you to try these electric kettle fixes first. Repairing your kettle may be easier than you think and it helps the planet!
When you replace an electric kettle it requires valuable natural resources to make a new one. So it’s better for the environment to repair and reuse the kettle you already have! In fact, when you reuse instead of replacing a kettle you’ll avoid the production of 1 kg of CO2, or the equivalent amount of 49 trees absorbing CO2 over one day. At first glance, that may not sound like much. But imagine the impact of every household in British Columbia (over 2,000,000 households) purchasing a new kettle each year and that adds up fast!
Initial Checks
Safety first! While you’re troubleshooting, pay special attention to see if the kettle is plugged in or not. Always ensure it’s unplugged while you are handling internal parts. Also, never fully immerse an electric kettle in water. This can destroy the heating element and electrical components.
To start, here are some key things worth checking that we all overlook sometimes:
- Is the kettle plugged in, and is the outlet it is plugged into working? The issue might be a blown wall fuse or a broken plug, and not an issue with the kettle itself.
- Is the lid closed properly? Some electric kettle models require lids to be securely closed for the heating process to begin.
- Kettle underfilled or overfilled? Some kettles have sensors that require a certain level of water for safety.
- Have you checked the Owner’s Manual for the manufacturer’s recommendations about caring for the kettle and common issues? If you don’t have a hard copy of the manual, most can be found online with a quick Google search.
- Remember to read the machine’s warranty before disassembling any parts to ensure you do not void it (if still valid).
Kettle still broken? Here’s 3 common electric kettle issues and how to fix them!
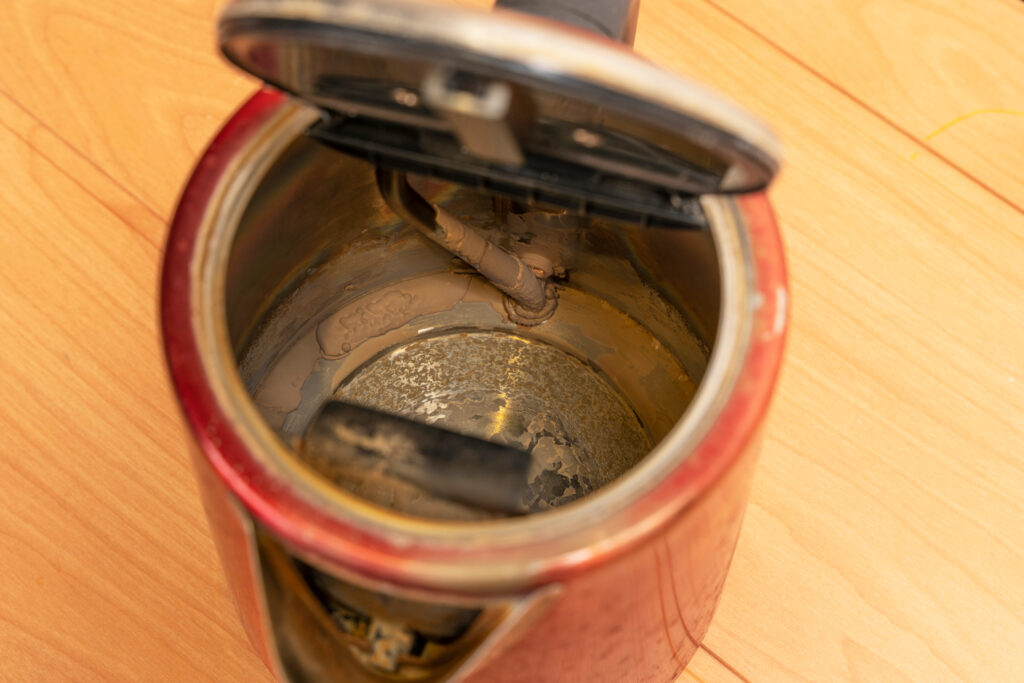
Does your kettle have chalky residue, odd-tasting water, or it turns on but doesn’t boil?
Ensure your kettle is clean and boils great-tasting water by giving it a regular vinegar bath to descale it. Regular cleaning with vinegar prevents the build-up of limescale. Limescale is that white chalky residue that is naturally occurring in drinking water and is completely safe to drink. However, it can make your hot drink taste a bit ‘off’. Depending on how hard your local water supply is, it’s recommended to descale your kettle at least 4 times a year. If your town’s water has higher hardness, you should descale more frequently.
In addition to improving taste, regular cleaning prevents issues with your kettle’s boiling and shutdown system. Electric kettles have built-in shutdown systems for safety that are linked to an internal sensor. Sometimes limescale debris on top of sensors can cause improper signals to be sent and this can result in the kettle not working. So keep your kettle clean to stay ahead of any sensor issues.
How to descale your electric kettle:
- Fill the kettle using a 1:1 ratio of water and distilled white vinegar or a descaling agent purchased at the store
- Boil the kettle with the mixture in it
- Turn off the kettle and let the mixture sit for 20 minutes or more
- Unplug the kettle and then scrub the inside of the kettle. Use a spot of extra vinegar on tough residue deposits.
Here’s a quick video overview of this process by The Spruce:
@thespruceofficial Easily remove hard water stains from your kettle by following these steps. #TikTokTaughtMe #TikTokPartner #CleanTok #TheSpruce
Electric kettle on/ off button loose or broken?
Sometimes the on/off button may be notably malfunctioning (eg. is loose, sticking, or is visibly damaged). The on/off button is usually a simple piece of plastic that covers and connects to the more complicated electrical switch components. Subsequently, in some cases the button can be easily repaired or replaced using only a screwdriver.
If the button piece is crooked or ajar, the plastic piece might just need to be re-fastened or clicked into place where it connects into the rest of the kettle. Cleaning the button area with a damp cloth and a small brush (eg. a toothbrush) could also help the button function better.
To check if the on/off button is fastened correctly and to see how to fix it, watch this video:
If the plastic button itself is notably broken you may be able to source a replacement online. Visit IFIXIT.com for the step-by-step instructions on how to replace an on/off button.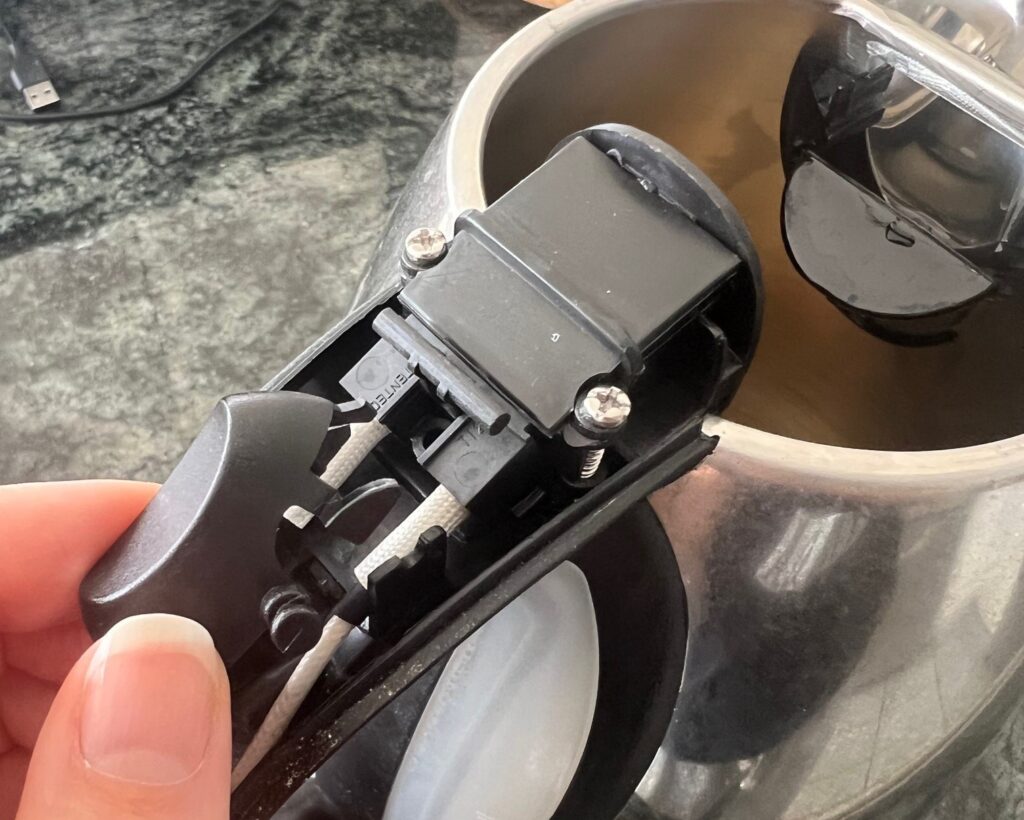

Electric Kettle sometimes works
If your kettle turns on and off unreliably it could be that the contacts of the kettle’s switch might need cleaning. What are the ‘contacts‘ of a switch? A contact is the conductive surface (commonly copper) of connectors and switches where the energy used to power the device flows. Over time the contact can corrode causing a blocked circuit. By cleaning the contacts you can remove any corrosion and ensure the kettle’s electrical circuit is clear.
To clean the kettle’s switch contacts you’ll only need two things: a screwdriver or small hex wrench and contact cleaner (also known as switch cleaner).
Here’s how to clean the contacts (as recommended by the Appliance Analysts)
- Undo the screws on the base of the kettle or the side of the kettle along the same side as the on/off button and handle.
- Optional – take off the on/off button cover (do this super delicately!) for better access to the contacts.
- Two wires will lead into the bottom of the casing that the on/off button attaches to. Where the two wires attach, there are contacts. Spray the contacts with switch cleaner like isopropyl alcohol or a specific store bought switch cleaner.
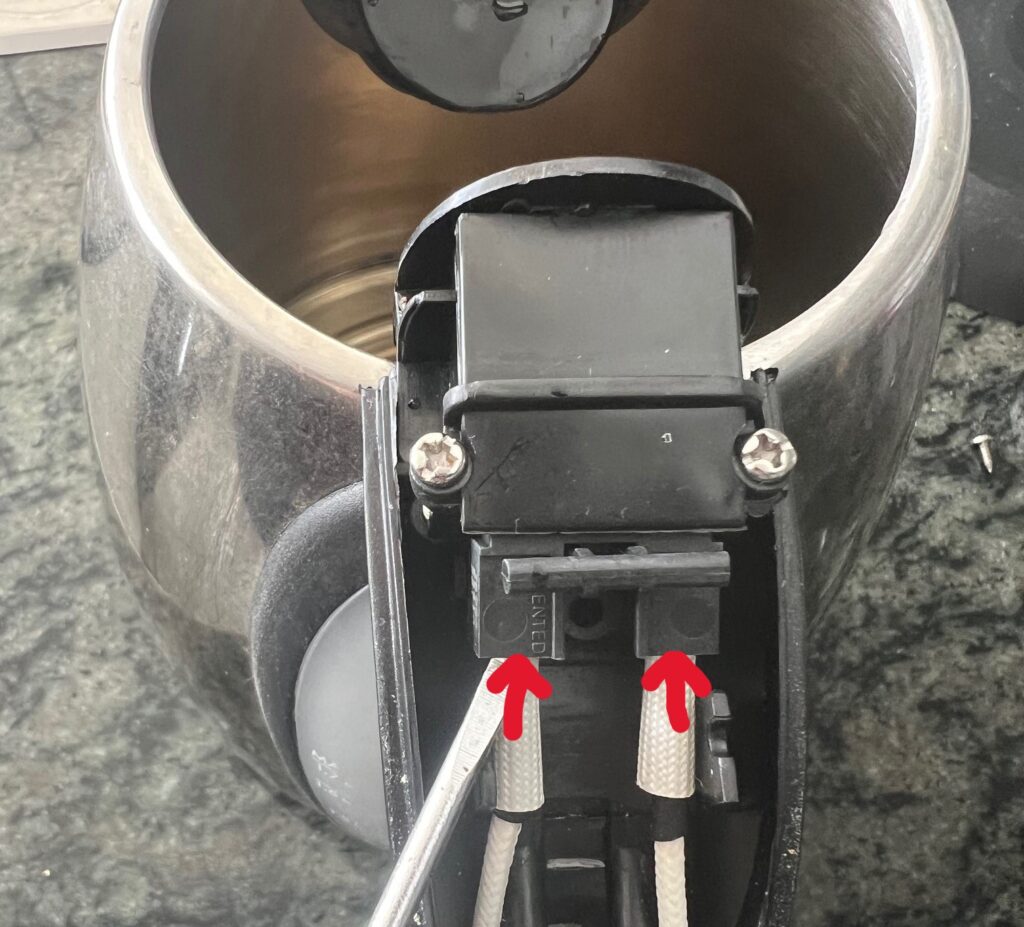
Contact locations indicated by red arrows. - Re-assemble the kettle.
- Without plugging the base into the power outlet, flick the on/off switch on the kettle a couple of times. This will clear any rust (oxidization) or unwanted substances from the contacts.
- Plug the kettle into the base and turn on to see if the issue is resolved.
There are also contacts on the base of the kettle and the heating platform that can get deposit build-up that impacts the electrical connection. However, to clean those takes a higher level of repair knowledge. We encourage you to do more research before attempting to troubleshoot and clean those contacts.
Need in-person help for your repair?
Check with a local repair shop or for an upcoming Repair Cafe happening in your community. Repair Cafes are community gatherings where visitors can get their broken household items fixed, free of charge, with the help of volunteer fixing experts. Some Repair Cafes even have 3D printers to print small plastic parts that need fixing like an on/off button!
Beyond Repair? Recycle it!
Lastly, despite careful maintenance and your efforts to repair, if your electric kettle stops working for good we can recycle it! We accept many types of countertop kitchen appliance for recycling at over 250 collection sites across British Columbia! Find a free recycling location near you on our Collection Locator page.
Author: Leah Coulter


Comments